
Inverter Commissioning - Complete Guide to Solar Inverter Testing & Commissioning
After the solar panels and inverter are installed, one very important step remains - Inverter Commissioning. Proper solar inverter installation is an important prerequisite for safe testing, configuration, and commissioning.
Many people believe installation is the finish, but proper Solar Inverter Commissioning is essential for checking that the system has been installed correctly, configured appropriately, and is ready for operation.
In this guide, we explain what inverter commissioning is, why it is important, the main commissioning steps, inverter testing, common checks, and frequently asked questions.
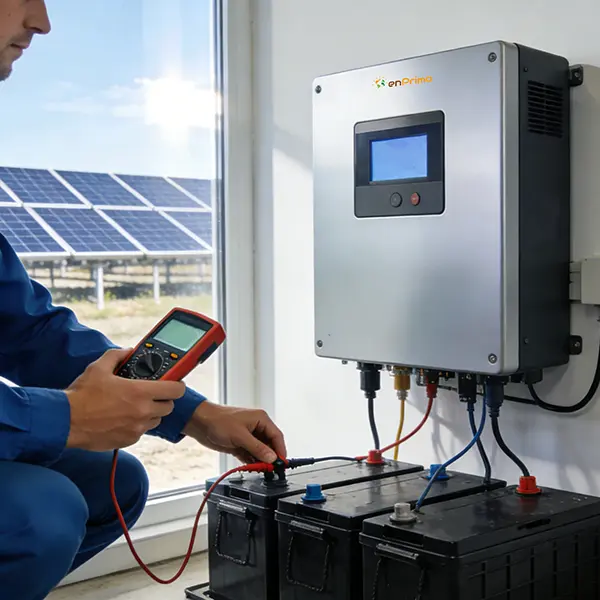
What is Inverter Commissioning?
Inverter Commissioning (also called Solar Inverter Commissioning) is the final inspection, configuration, and testing process performed after the inverter and associated solar equipment have been installed.
The commissioning process helps confirm that:
- All connections are correct and safe
- The inverter is configured properly for the local grid
- The system starts and runs without problems
- Protection features work as expected
- Monitoring is set up correctly
Think of it as the "final health check" before the system starts working fully.
Why is Solar Inverter Commissioning Important?
Proper commissioning helps identify installation or configuration problems before the system enters regular operation.
Without proper commissioning, problems can appear later:
- Inverter may not start properly
- Power generation may be lower than expected
- Safety features may not work during a grid failure
- Warranty can become invalid
- Faults may take longer to find later
Good Commissioning Services catch small issues early and give you confidence that everything is working as it should.
Main Steps in Inverter Commissioning
Professional teams follow a clear process. Here is a simple explanation of the main steps:
Visual and Mechanical Check
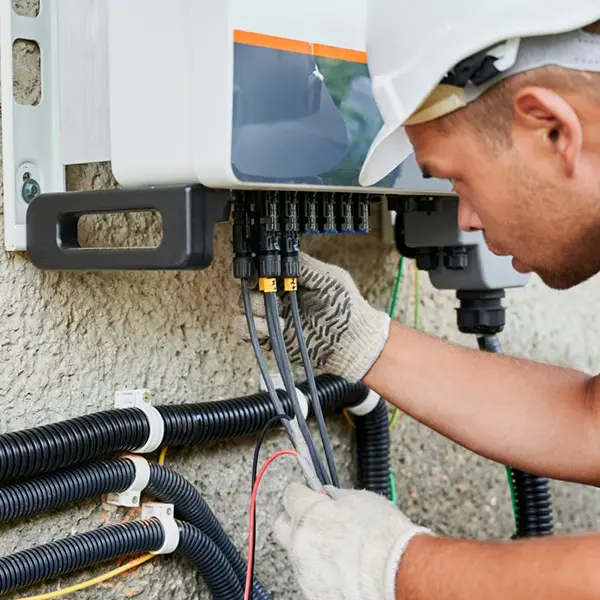
The technician looks at the whole installation. They check:
- Inverter is mounted firmly
- Enough space for air flow
- All cables are properly fixed and labelled
- No loose connections or damaged parts
If the installation requires a detailed assessment of the site, equipment location, wiring or system configuration, technical and site visit support can help identify site-specific requirements before commissioning.
Safety Isolation
Before carrying out electrical tests, the relevant DC and AC power sources are isolated according to the manufacturer's safety procedures and applicable electrical requirements.
DC Side Testing
DC-side testing is an important part of Inverter Testing.
- Polarity of each string is checked (positive and negative correct)
- Open circuit voltage (Voc) of every string is measured
- Insulation resistance is tested to check for any leakage or damaged cables
- Continuity of earthing is verified
These checks help verify that the solar PV strings are correctly connected and suitable for connection to the inverter.
AC Side Checking
The technician checks the AC side of the installation, including:
- Grid voltage and at the connection point
- Correct breaker and cable sizes
- Proper earthing on the AC side
- Earthing and protective connections
- Phase and neutral connections, where applicable
Inverter Configuration
The inverter is configured using the manufacturer's interface, software, or commissioning application.
Depending on the system, settings may include:
- Country or grid code selection
- Voltage and frequency limits as per local electricity board rules
- Export limitation settings, where required
- Date, time, and communication settings
Firmware is updated if needed.
Energising the System
First the DC side is switched on, then the AC side. The inverter goes through its start-up sequence and synchronises with the grid.
Functional and Protection Tests
Depending on the system, commissioning may include checking important operating and protection functions, such as:
- Anti-islanding test (inverter should stop feeding power if the grid fails)
- Checking that generation starts correctly
- Verifying power flow direction
- Testing monitoring app and data communication
Performance Check
Under the sunlight the technician checks whether the system is generating power close, to the expected levels. He records the readings carefully:
- Solar irradiance
- Panel temperature
- Shading
- System losses
- Time of day
- Weather conditions
Documentation and Handover
All test results are recorded. The customer is shown how to use the monitoring app and given basic operating instructions.
The customer may receive information such as:
- Commissioning or test report
- Inverter serial number
- System settings
- Test readings
- Warranty information
- Monitoring access details
- Basic operating instructions
What is Checked During Inverter Testing?
Key items in Inverter Testing include:
- Correct DC voltage from each string
- No reverse polarity
- Good insulation resistance
- Proper earthing
- Grid parameters matching the inverter settings
- Protection functions working
- Communication and monitoring active
All these checks help ensure long-term reliable performance. If testing identifies abnormal readings, alarms, communication problems or other issues, solar inverter troubleshooting may be required to identify the underlying cause.
Why Professional Commissioning Services Matter
A trained technician with the right tools and knowledge:
- Follows manufacturer guidelines and safety standards
- Uses proper testing instruments (multimeter, insulation tester, clamp meter)
- Configures the inverter correctly for your local grid
- Creates a proper commissioning report
- Protects your warranty
Skipping proper Commissioning Services can lead to hidden problems that appear months later.
Common Tools Used in Commissioning
- Digital multimeter
- Insulation resistance tester (megger)
- Clamp meter
- Manufacturer commissioning software or app
- Torque wrench for checking tight connections
Tips for Homeowners
- Ask for a written commissioning report
- Request a demonstration of the monitoring app
- Confirm that anti-islanding and protection tests were done
- Keep a copy of all settings and serial numbers
- Note the date of commissioning for future service
Common Mistakes to Avoid
- Switching on the system without proper testing
- Incorrect grid settings
- Reversed CT (current transformer) direction in hybrid systems
- Ignoring insulation resistance results
- Not updating firmware
- Poor documentation
How Long Does Commissioning Take?
For a normal home system, commissioning usually takes a few hours once installation is complete. Larger systems may take longer because more strings and tests are involved.
Final Words
Inverter Commissioning / Solar Inverter Commissioning is the last and most crucial stage which converts a new system into a safe and functioning solarplant. Correct Inverter Testing and reliable Commissioning Services provides confidence that everything is in order.
Ensure your installer is able to complete a full commissioning when installing an inverter and is able to provide good documentation. Proper commissioning means a system that will start up smoothly, reliably produce power, and most importantly protect you and your home as well as the national grid.
We want you to take this step seriously, because it is one of the most important things you can do to maximize your solar investment.
Frequently Asked Questions (FAQs)
Common questions about Inverter Commissioning, Solar Inverter Commissioning, Inverter Testing, and Commissioning Services.
Contact Us Solar Inverter Commissioning
Inverter Testing
Commissioning Services
DC Side Testing
AC Side Checking
Solar Inverter Commissioning
Inverter Testing
Commissioning Services
DC Side Testing
AC Side Checking

Need Our Services?
Call: +91 7349150222
Work Hours
Mon to Sat 9:30 am-6:00 pm
Email Us
admin@enprimo.in